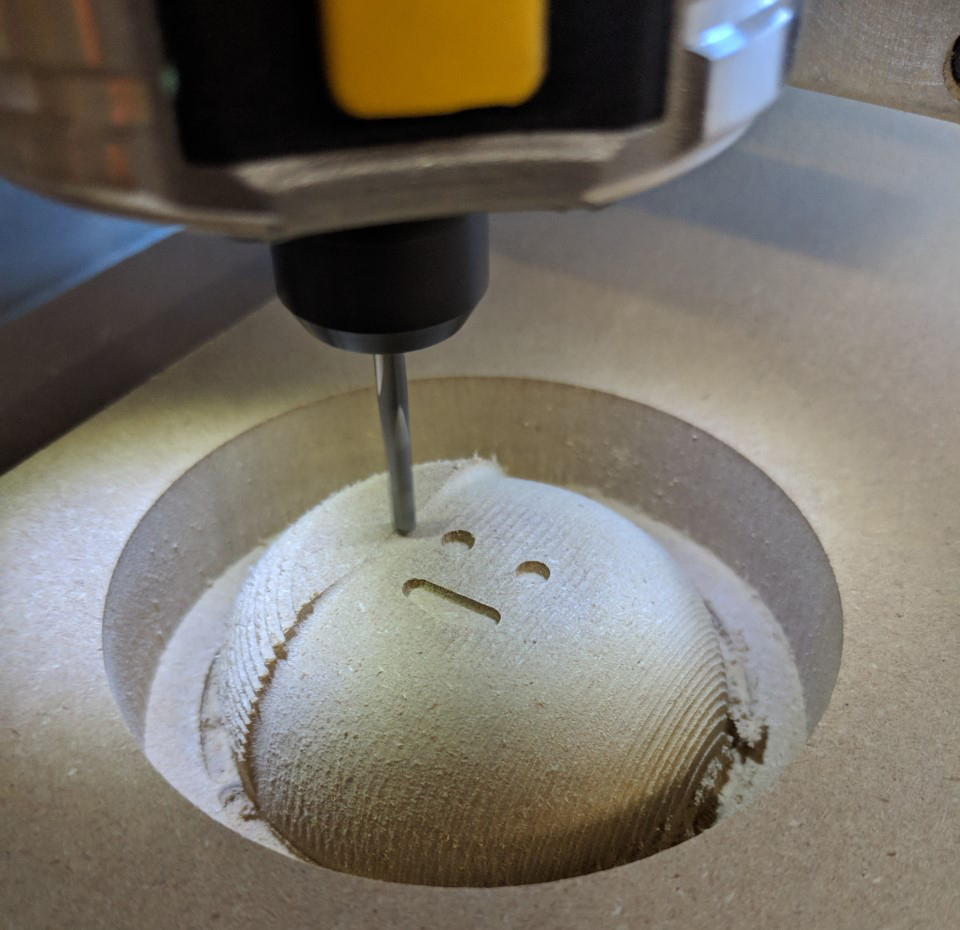
After getting the CNC router dust free and able to hold down anything it was time to play. Aside from simple tests anyways…
Being an avid user of Fusion 360 I’ve, of course, been learning as much as I can about the CAM process using that. However, sometimes I like to get a little artistic and Fusion 360 falls down in that area a bit. The problem is that it doesn’t really support object meshes with more than 10,000 polygons. (For the uninitiated, files like the STL format store objects as a series of triangles. And even simple objects can have many thousands.) This makes sense as it’s really meant for running CAM processes on objects designed in the tool itself. But it’s a bit disappointing when I want to do something a little more complex.
Enter MeshCAM
While MeshCAM can technically do just about any type of CNC CAM work, where it seems to really shine is high polygon-count objects. Now, please note, this is not meant to be a review of the tool. It just happened to be what I found that worked. It’s also not cheap at $250, so it’s up to you to decide. However, it was able to produce some pretty astounding results.
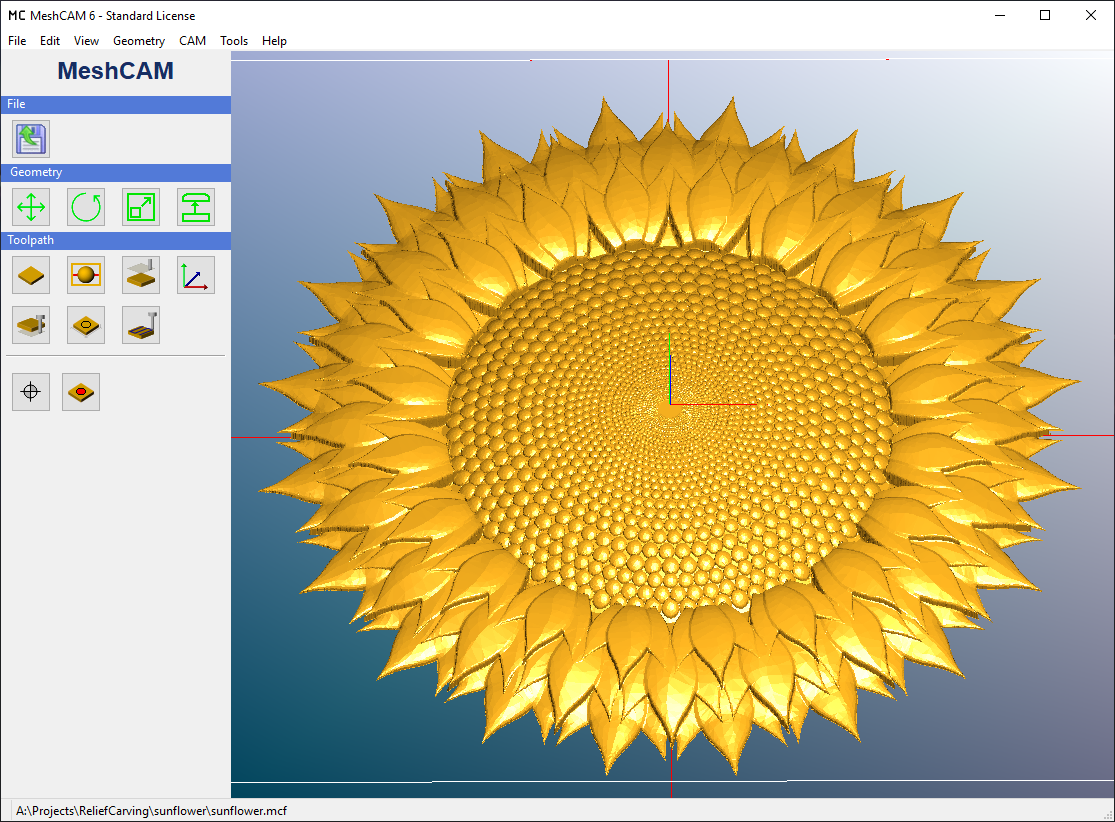
The interface is pretty simplistic but, in this case, that’s a good thing. I really only wanted to use it for relief carvings and the simpler the better. All that needs to be done is choose some basic settings such as bit type, step-over, and pass-depth for both roughing and finishing passes. Once that’s done, let it churn… for a while. This is complex math after all. But it will eventually finish and leave you with something like this:
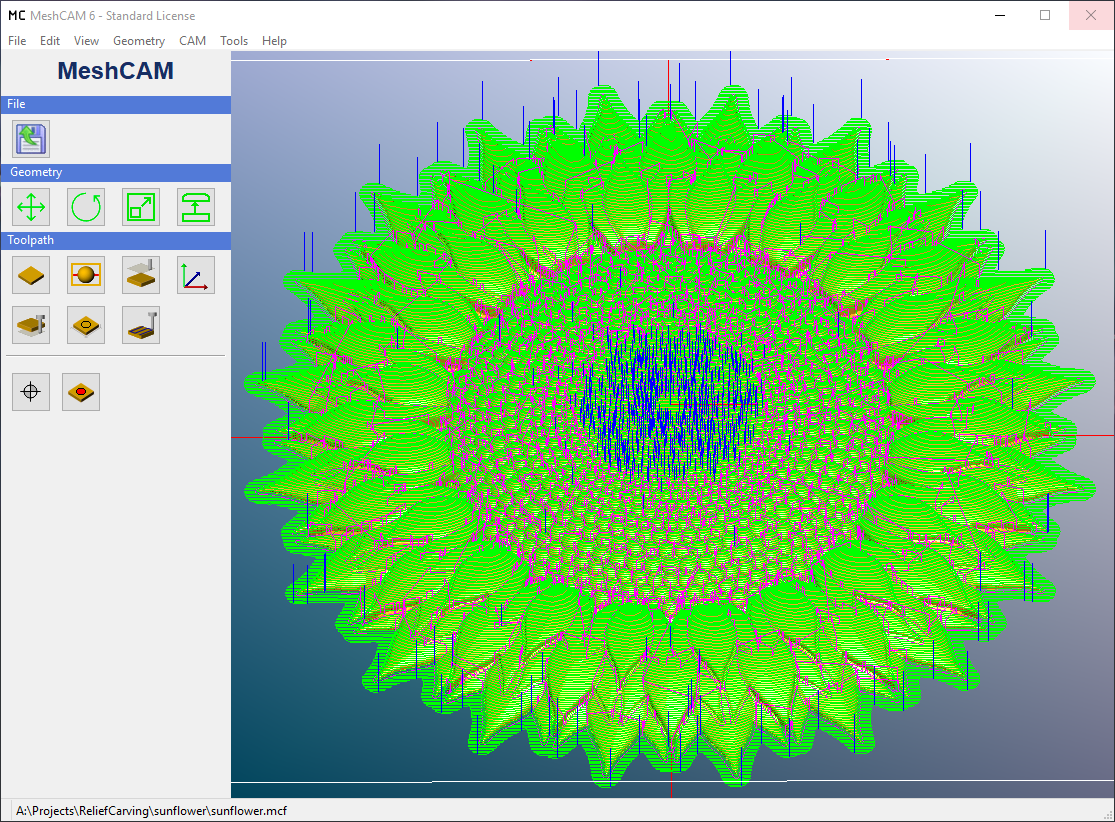
If that looks like a lot of lines… that’s because it is. I used the suggested finishing step-over of 0.0159” with a 1⁄16” ball-end mill which means over 500 passes to complete the full 8” height. But I’m getting ahead of myself. With the toolpath worked out the first step was to get the material loaded on the CNC.
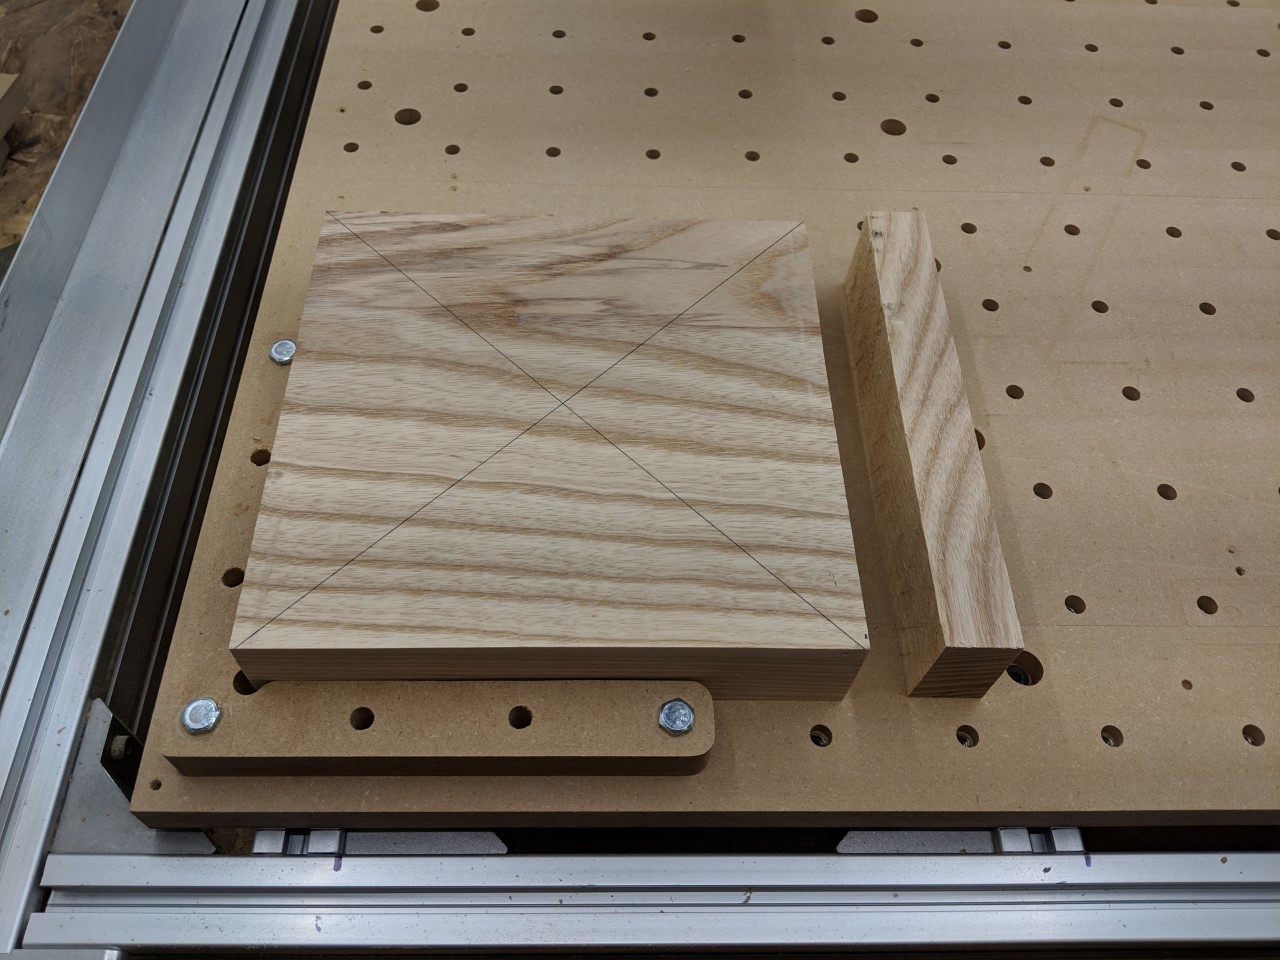
This was a piece of white oak that I found in a scrap bin at The Scrap Exchange in Durham, NC. After a few passes through the planer and squaring up the edges, it was ready to go. The right angle bracket you see is one that I made mainly for use with some cam clamps but here is used to square the wood to the machine. Since I was still working on the clamp design I decided to just use double sided tape instead. And the smaller piece to the right is a cutoff that I also taped to the wasteboard for the sake of zeroing Z after the first pass and bit change. Since the toolpath would completely cover the main piece I would loose my Z reference without that smaller piece.
As you can see below, even after the first pass it looked pretty good!
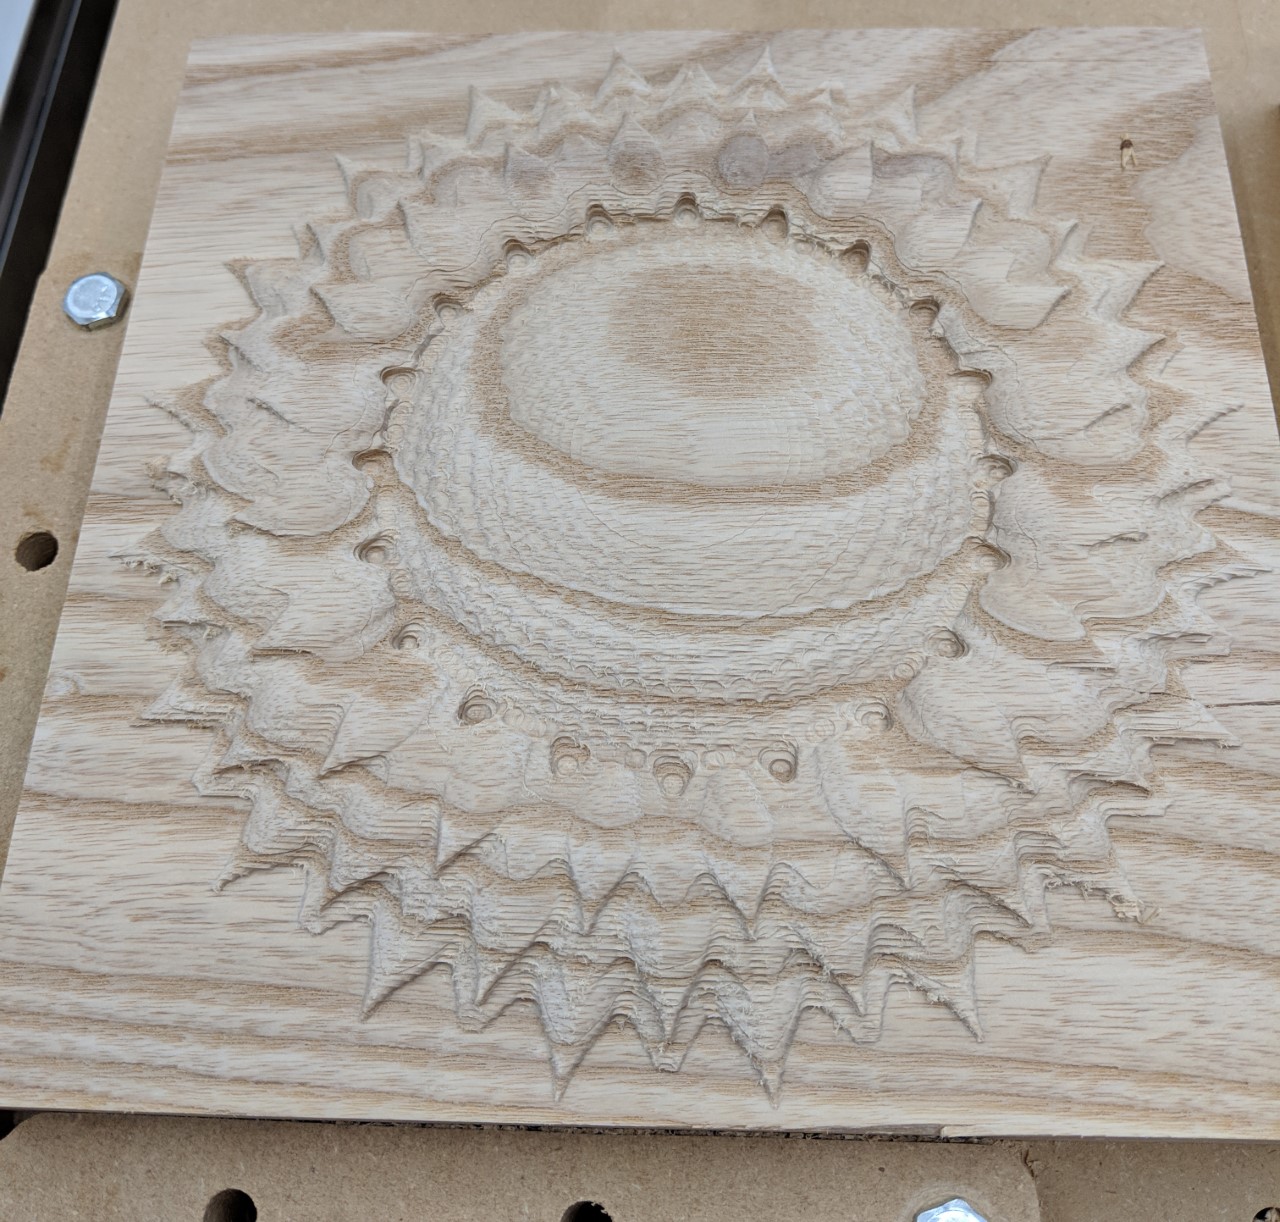
But, it better have… this took over 4 hours! It was done with a 1⁄8” 4-flute straight bit and, as is probably apparent in the picture, I likely could have backed off on the step-over and left the finish rougher. But if you think that took a long time, wait until the finishing pass!
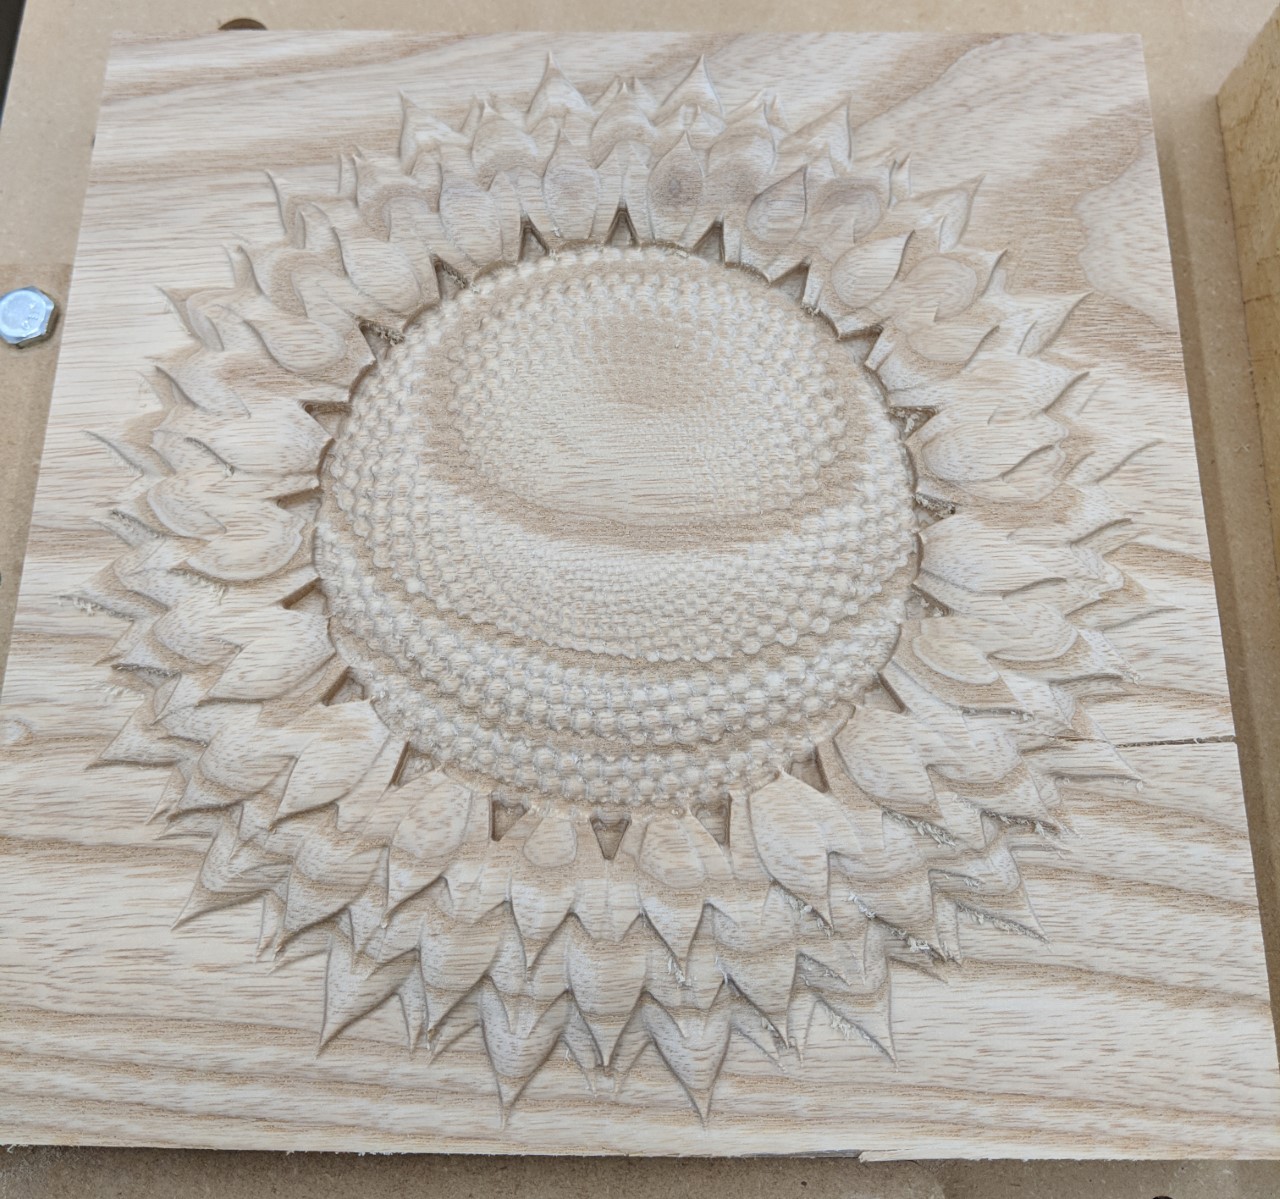
12 hours. This took 12 hours.
As noted above this was done with a really small step-over. I’ll have to experiment with a smaller piece to see if I can find a balance between speed and quality. And this was even with the CNC running at a max speed of 150 inches per minute (it maxes out at 200). However, it rarely ever gets going that fast as it needed to move in and out of all those intricate details that I rarely ever saw it break 40, except on the edges. But, it was worth it :)
Even more so, when it’s been cleaned up and finished:
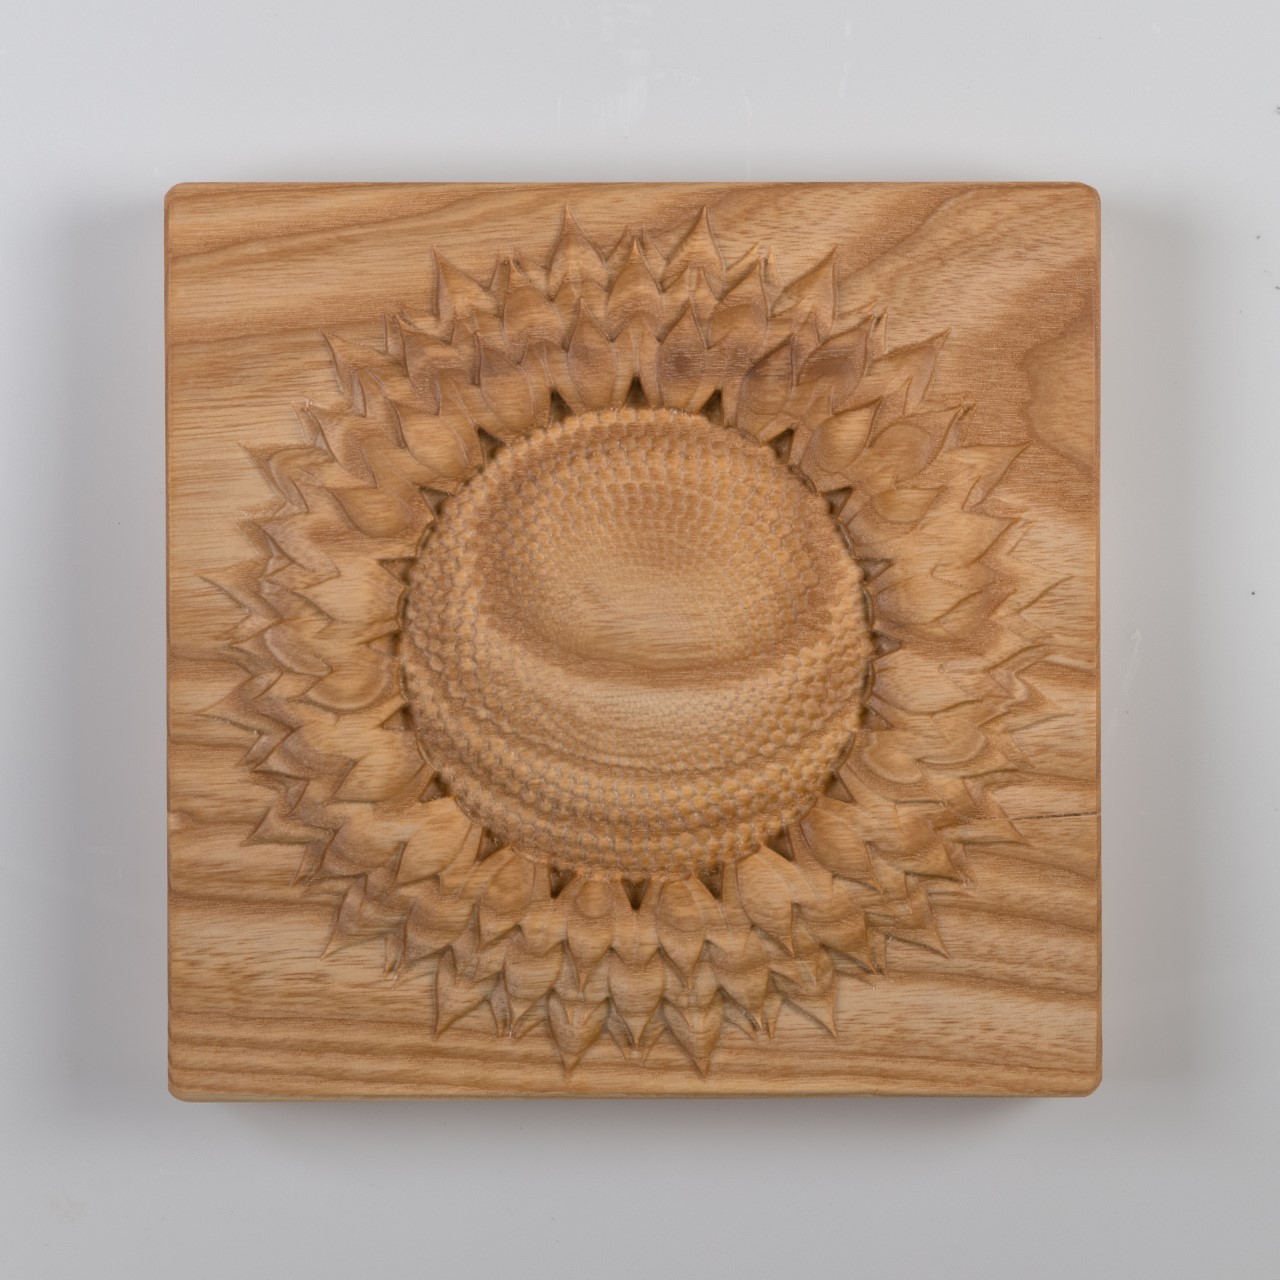
The most finicky part of final finishing was detail sanding in the few detail areas that remained a bit fuzzy. But then a trip around the disc sander to knock down the corners and edges cleaned it up nicely. Finally, to complete everything I gave it 3 coats of boiled linseed oil. This brought out the detail of the wood without really changing the overall look too much. It still looks like natural wood and that’s what I wanted.
I’m definitely excited to explore this type of CNC work more. And my parents, who I gave this too as an anniversary present, absolutely loved it :)