Sunrise Alarm Clock - Prototype
- SparkFun Arduino Pro Mini
- Adafruit DS1307 RTC Breakout
- Adafruit I2C 7Seg Display
- N-Channel MOSFET STP16NF06L
- 2x Tactile Switches
- 12V @ 2A wall power supply
- 12V White LED Strip (5m roll)
While I rarely sleep past 6am, or sleep at all for that matter, my wife does require an alarm clock from time to time. After a recent few days of her alarm going off right in the middle of a R.E.M. sleep cycle she mentioned a desire for a more gentle alarm. I’ve seen those sunrise alarm clock lights many times before, but they but they are a bit pricey and she didn’t want a light that would be right next to the bed. Rather, something more subtle.
After a call to Dan to see if he had the few parts I was lacking, I realized a prototype should be an easy build with no need to buy anything new. Here’s the parts list:
The parts hookup looks like this:
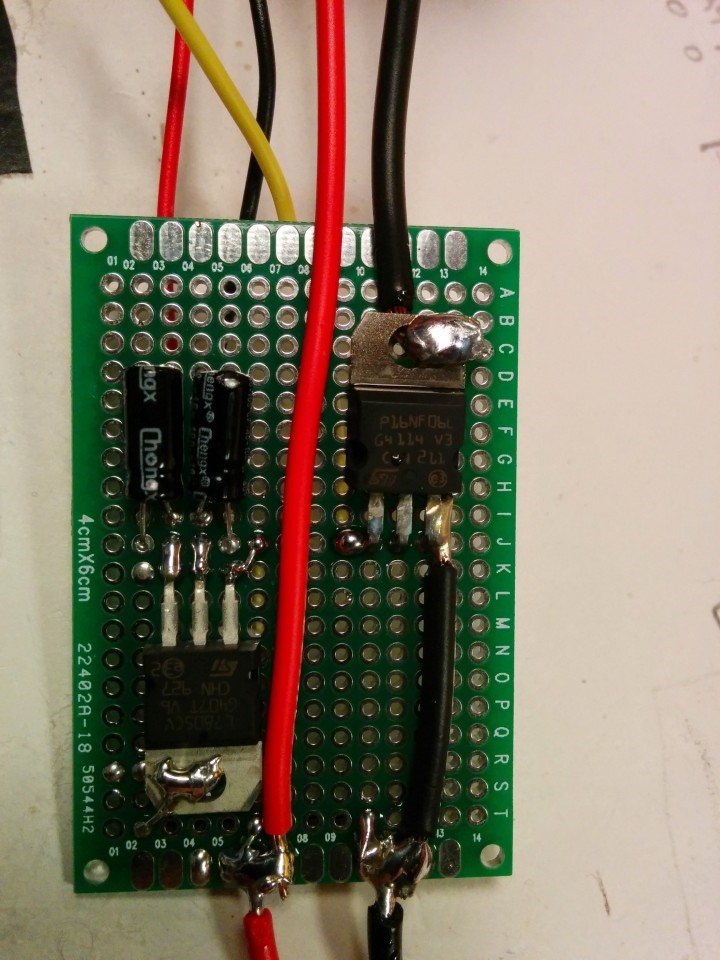
Or, in the real world:
The green board exists purely because I couldn’t fit the MOSFET on the breadboard with everything else. Ignore the L7805 regulator (the TO-220 package with the capacitors); I forgot that the Pro Mini had a built in voltage regulator capable of up to 12V.
The MOSFET is used to drive the LED strip since it can draw a couple amps at full brightness. For more information on how to hook up high current LED strips (the “analog” kind where you control the whole strip, not each pixel) Adafruit has a great tutorial. In this case, its gate pin is connected to pin 6 on the arduino since it is one of the PWM capable pins. Setting the strip brightness is as easy as calling analogWrite(6, brightness) where brightness is 0-255.
The DS1307 Real Time Clock and 7 Segment display both use I2C so they are hooked up to A4 and A5 (SDA and SCL). The two tactile switches are connected to pins 2 and 3 which correspond to INT0 and INT1, the external interrupts, which makes the button handling much easier (see the code for more info).
That’s really all there is to the hookup. The alarm functionality works by storing an alarm time in EEPROM (which is loaded into RAM in setup()) and in each pass through loop() checking how long it is until the set alarm time. In this case, it is actually looking for 15 minutes before the set time because my wife wanted it to reach full brightness by the set time and fade in slowly. If it is within that time span, it starts at minimum brightness and increases by one every 3 seconds (15min / 255 = 3 seconds).
I installed the strips in 4 rows, wired in parallel, onto a scrap 1x3 board I had lying around. As you can see from the picture below, they are quite bright, but only draw about 10W. I even added a function where you can press and hold one of the buttons to just turn the light on or off since it’s now the brightest light in that room.
The board with the LED strips was then installed directly behind the headboard of our bed so that it would provide bright, ambient light, but never be directly in your face. The picture below is of the strip at full brightness, having just completed the fade-in from testing the alarm.
For now, this is just a very rough prototype to see if it even works for my wife. If it does, I will be making a bespoke PCB for it and a nice case, probably with some big, arcade style buttons.
For more details, check out the GitHub Repo which includes all of the source code as well as the fritzing schematic seen above. If I design a proper PCB and case for it, I will upload them there as well.


